

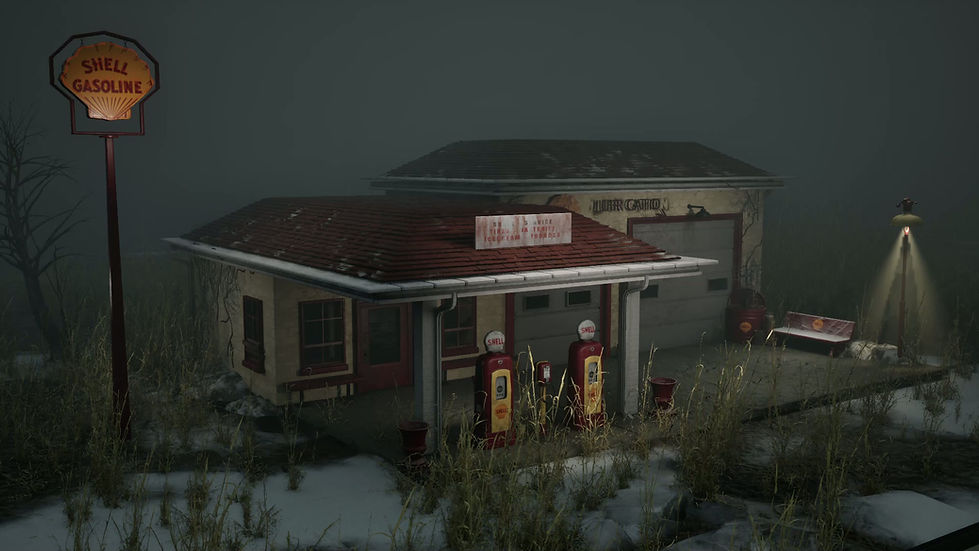
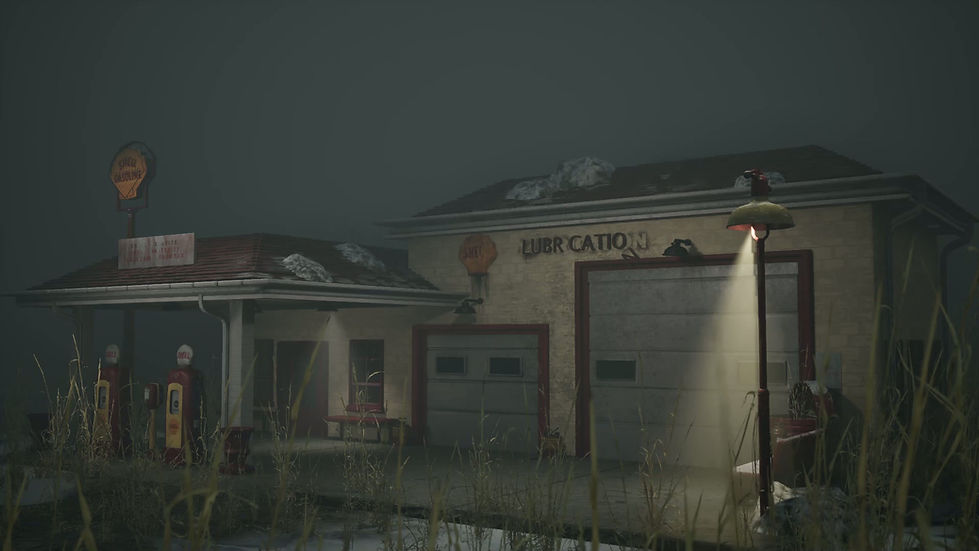
1950's Shell Gas Station
1950's Shell Gas Station


Renders in Unreal Engine 5.7
Breakdown
I was initially inspired by the Shell Gas Station in Waupecong Indiana. I have seen the gas station in person many times and have always wanted to create a piece based on this landmark. References were taken in person at the gas station and additionally sourced from the internet. I aimed for a unique 1950’s retro style in an early winter environment. Along with the gas station, I gathered references of thawing snow in the Midwest and abandoned buildings

References
White Box and Planning
In the beginning stages of the project, I constructed the whitebox for the scene with some test lighting and post process volume.
The whitebox allowed me to set the correct scale, analyze the reference images, determine which pieces needed to be modular, determine which parts could utilize a trim sheet, and how lighting and post processing would affect the colors of the scene. I created a checklist of the props needed for the project, utilizing Asana to organize tasks.
In the second stage of the white box, I made temporary materials to test the lighting and determine the optimal color hues and values to achieve my desired style in a low-light environment.
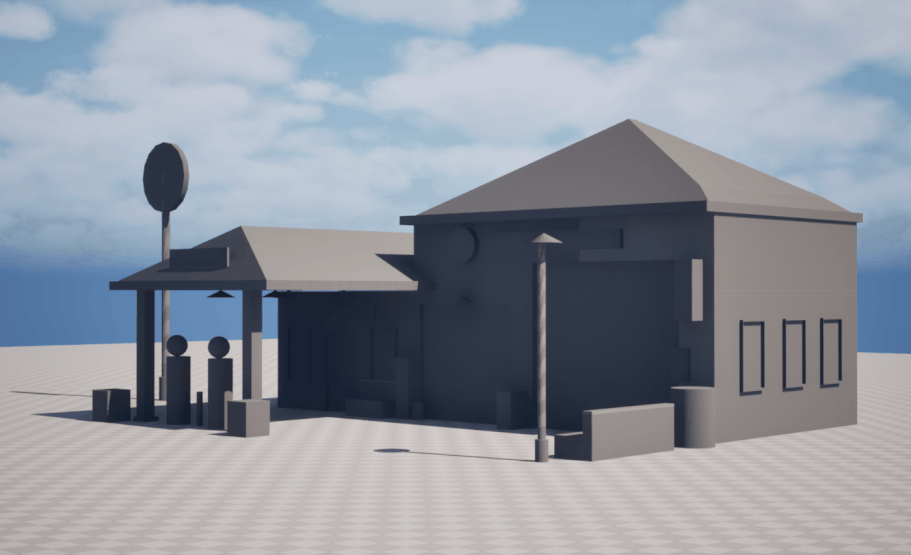
Whitebox Start to Finish
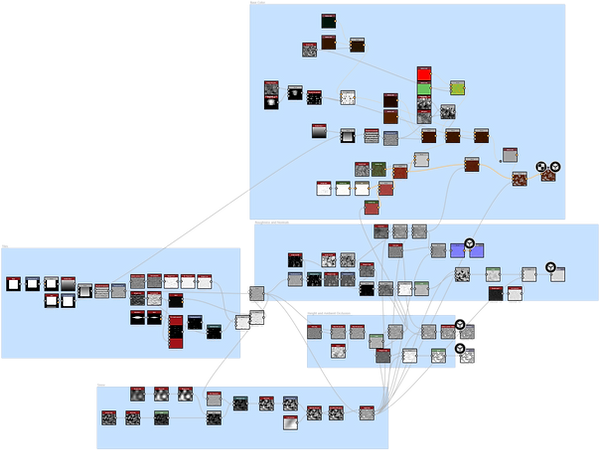
Materials
I designed the roof and wall materials first as I would need them as reference when assembling the final building. After several iterations, I settled on a grungy red tile roofing. I utilized several layers of different colors and grunge patterns to achieve a realistic style.
To prepare for vertex painting, I created a second red tile roof material with patches of snow caught on the tiles.

Red Roof Tiles Material Graph
Red Roof Tiles Snow Material Graph
I went through several iterations on the wall material as well. I used Substance Sampler to create a tileable material using a photo of the building’s wall. However, the image that I had was not a big enough sample to be able to make an effective tileable texture. I plan on sourcing a more effective reference image when I return to Indiana this summer. In the meantime, I created a reference-accurate brick material in Substance Designer.

Wall Material Graph
I created a trim sheet for structural pieces, gutters, supports, and the wood under the roof.


Final Materials in Unreal Engine
Trim Sheet
Unreal Engine Tools
Next, I focussed on solidifying the terrain and base lighting for the scene. I created baseline lighting to assist in color development. For this phase of the project, I developed my skills with vertex painting and cell bombing, which I utilized to create dirt/grass and snow on the terrain and vertex painted snow on the roofs.

Cell Bombing Material Function
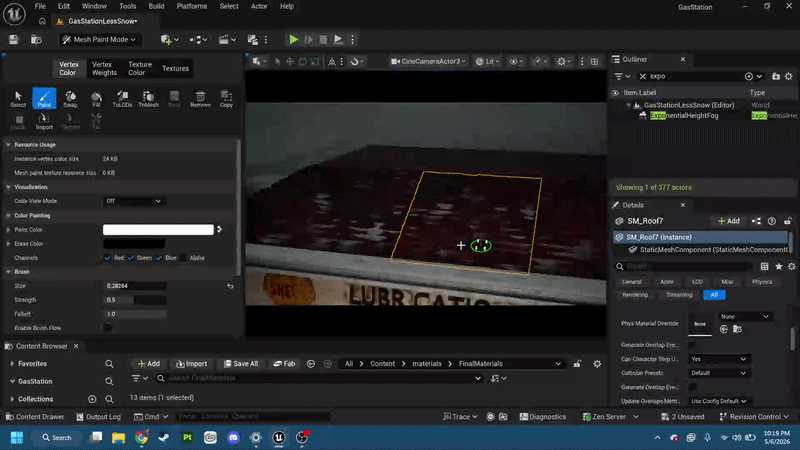
Roof Vertex Painting
One of the new techniques I utilized for this project is a Z-Up shader that shows snow on objects exposed to the weather. I turned this Material into the master material that all props materials areMaterial Instances of. I turned the Z-Up Shader into a “HasSnow” parameter that can be modified per Material Instance.
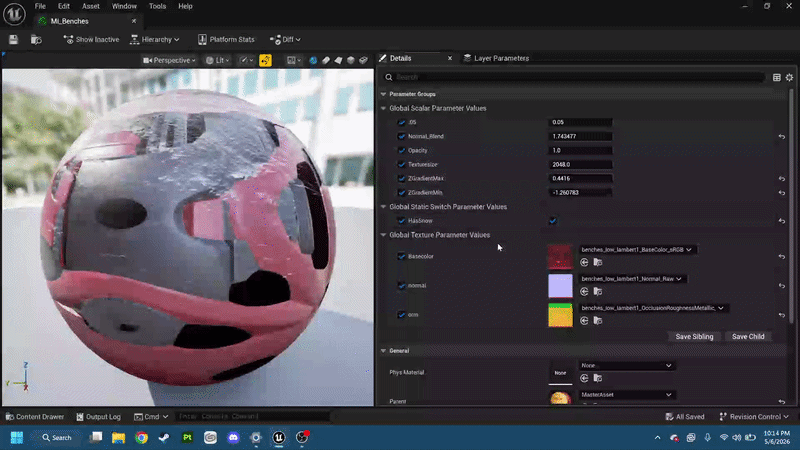
Material Instance
Next, I created a Vine PCG graph that procedurally selects a path on a set of points on a tagged static mesh to create a randomly generated vine path for a natural look. For the small vines, a decal of real vines on a wall was used below the PCG Actor to create the illusion of more vines while being performance conscious.
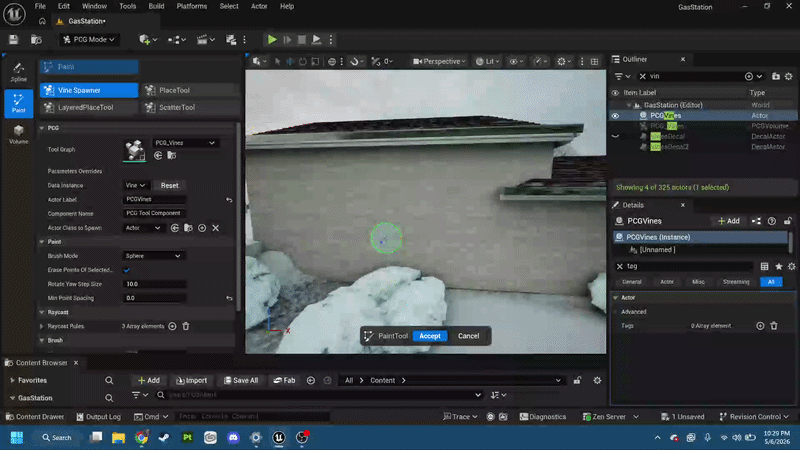
Vine PCG
Prop Modelling
My next focus for the project was prop modelling, which I had the most prior experience in. For the workflow, I mainly made the low and high poly in Maya (with exception of structural assets utilizing the trim sheet), and textured and baked using Photoshop and Substance Painter.
All text, graphic design, and decals featured on props were created in Photoshop.
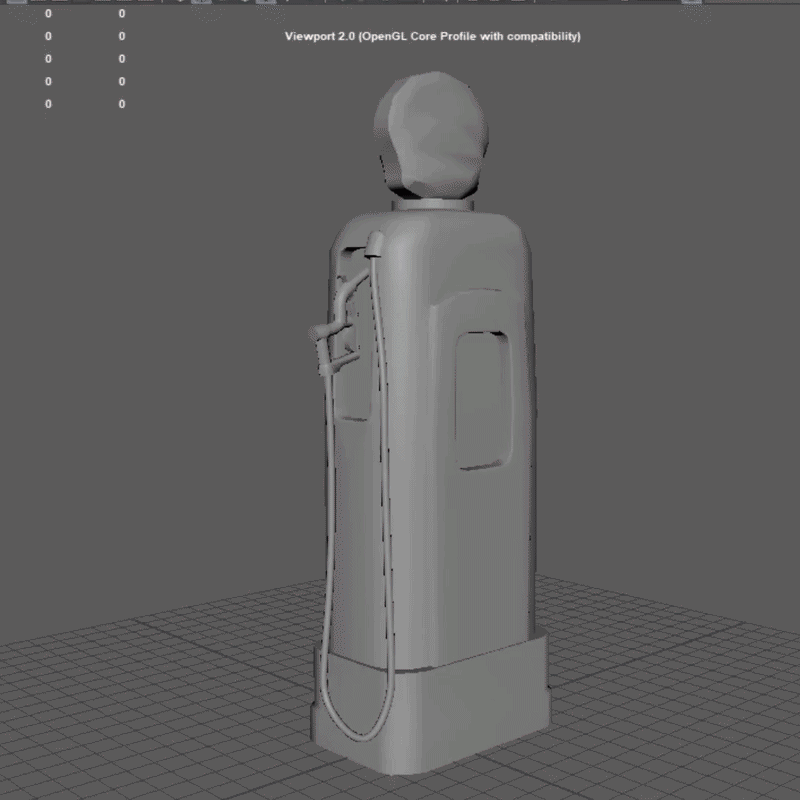
I created a mid-poly of every prop before continuing the prop workflow to test as a proxy in the scene, which allowed for an easy implementation once the props were finished.
Prop Modeling and Texturing (High and Low)

For continuity across props, I created my own Smart Material in Substance Painter consisting of the red paint used on several props.
In Progress Scene with Proxy Models
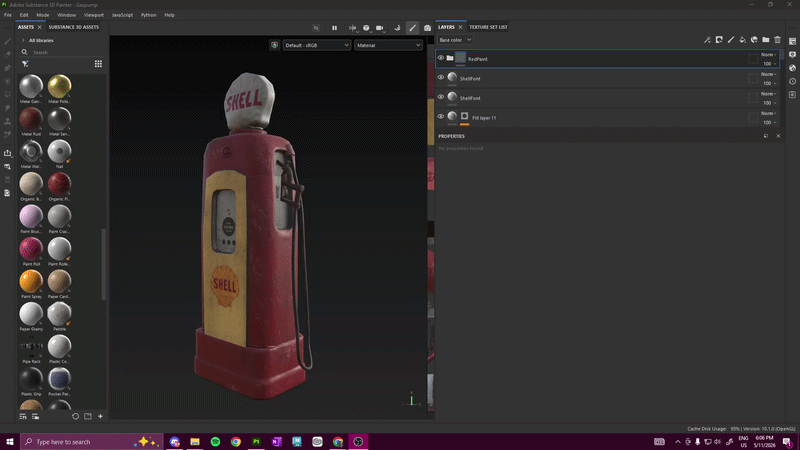
Red Paint Smart Material
Post Processing

